
Uschi van der Rosten´s online tutorials - Uschi van der Rosten Wood Grain Decals
Painting wood grain by hand
Here comes a sbs-sequence for the "old-school-stylists" amongs us. :-)
Painting woodgrain by hand requires a loose wrist and a bit of practice.
So, here comes the plan: We gonna work with a glaze with oil colors, just the old-fasioned way as seen in the WNW manual for example. This is nothing but airbrush an acrylic base tone and putting a glaze with brown oils upon it.
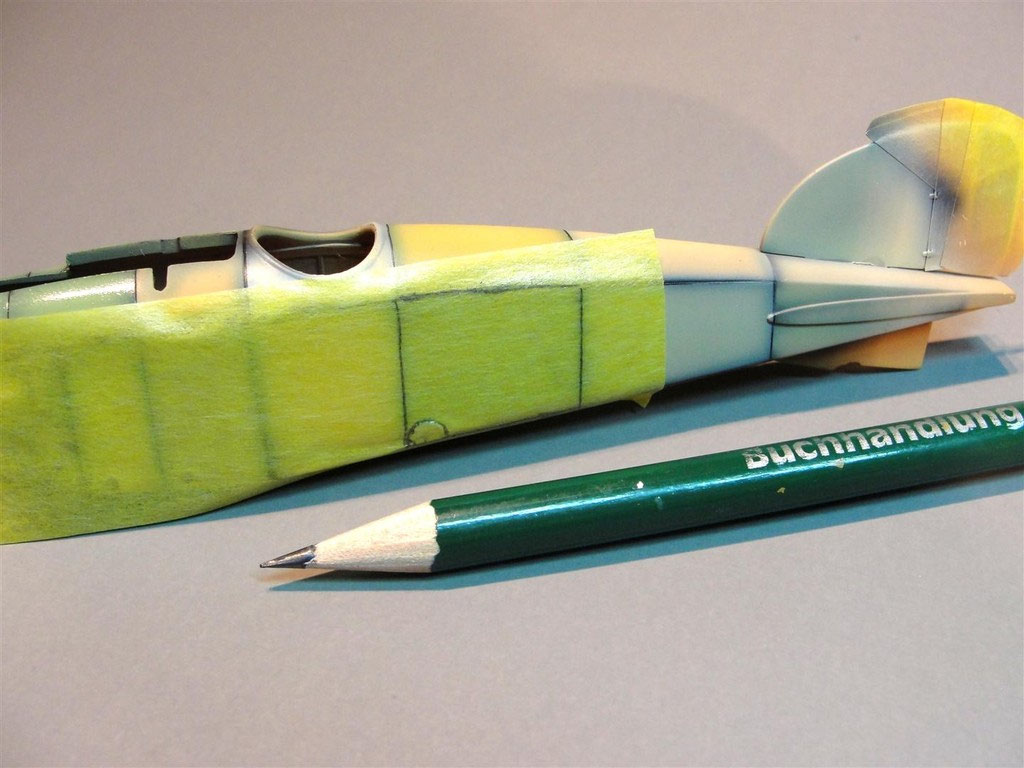
All we do now is adding a new effect-layer to it: Before we apply the oils on the basecoat, we paint a woodgrain effect in a hatching manner, using a pin brush. Then we apply the oils and the grain will show through nicely.
Thats the deal. Like it? Ok, lets go.
You don't have to be a professional for creating a woodgrain with a hatch. All you need is some exercise. Lets get used to it.
For the practice I suggest two things:
- Take a piece of paper and a ball pen. Try to make many light strokes parallel to each other and reduce the pressure to so far, that the end result is a field with one single solid "shadow". Its a hatching what we are after and a ball pen is a good thing to train that.
- Take a piece of plastic, paint it with dark yellow. Mix a light acrylic yellow and try to repeat the hatching style on that peice, now using a brush instead of the pen. Make sure the grain has a good contrast to the basecoat. Overdo that contrast. It gonna look strange for first, but once you´ve put the oils on it, this glaze gonna balance the picture and create the final effect. If we have no contrast beneath of the glaze, it will not shine through. Ok? Ok.
We do have the following triggers available to influence and controlthe final result:
- The tone and shading effects on the base coat.
- The contrast of the wood grain to the base coat
- The tone of the oil colors for the glaze.
- Post toning effects on top of the glaze, using clear acrylics.
- Post shading effects using acrylic "clear smoke".
- Semi-mat or flat clear acrylics for the finish.
Between 1 and 2 we also have the option to create variation using so called "Filters" to affect the tone of the base coat. In the following I´ll keep it simple and do not discuss this step. Its somewhat self explaining anyway.


1st: Preparations
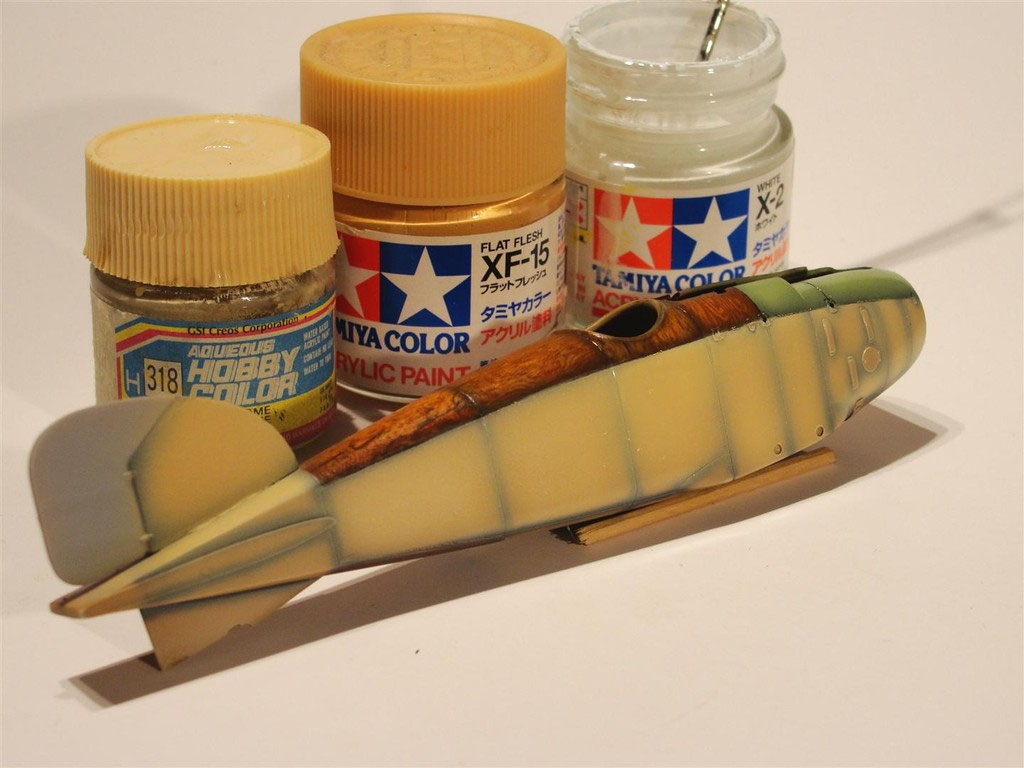
What we need is bunch of suitable acrylics and 2-3 cool oil colors. The brand dosnt matter for what we have here. I just took what I had on my bench. I may recommend my friends at AK-Interacive. They do produce nice acrylics and very fine oil colors. This way you would find everything in one product range instead of having to order on many different places. In case you have everything already, lets go ahead.
For the glaze oils we need a burnt sienna oil color and a light ochre for toning. A lil bit of orange also would be nice. For the acrylic basecoat we need radome, flesh or yellowish tones. I jar of white for brighting it up is always welcome.
I strongly recommend to have a good collection of colors availale all the time. It makes way more sense compared to a good collection of kits, if you know what I mean. :-)


2nd: Give it a shot


All that is now ready to be covered with a Glaze of Brown(ish) Oil Colors.
I went from panel to panel, treated each one like one unique panel.

After some 4-5 days drying time I gave them a coat of Clear Acrylic. This final step revealed the finish and was like...yeah..magic...if that makes sense.


To be continued
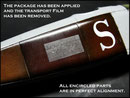
Creating dark types of wood / Using paint masks on decals
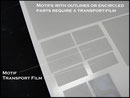
This tutorial covers techniques to render dark woods, using the "acrylic approach". It is based on the application of WGSF-48"Ronny Bar" and WGSF-48 "Knotless". These decals are designed to be applyed on top of the paintjobs and will be covered with a clear acrylic sealer only.
This method is definitely faster as the use of oil colors as shown below on the example of the WGC and WGF series.
The results will differ of course and both methods have their "right to exist", if that makes sense.
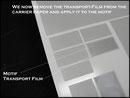
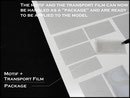
Basically the whole process is pretty simple. We apply a basecoat in the tone we want and put the decal on top of it. Sealing, done.
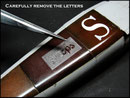
Lets find out if we can work with masks on top of the decals to make it a little bit more interesting.


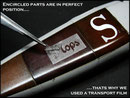
If we work with masks on top of a decaled surface, we also have to make sure that the decals have over-average grip to the surface.
To achieve sufficient grip for decals I recommend to use flat colors for the basecoat. This differs from what is recommended elsewhere, which is basically to apply decals always on a glossy surface to avoid silvering.
In case we have found a nice tone but of the glossy kind, we may just put a few drops of the so-called "flat base" mediums, available by Tamiya and Gunze, into the glossy color.
Why should we do that?
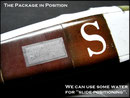
A flat surface will allow more grip to setting solutions. The glue (thats what setter basically is) interdigitates with the flat particles in the colors.
In our case we use Mr Mark Setter by Gunze, and put a few drops of white carpenter glue in it. This will strengthen the adhesive force even more.
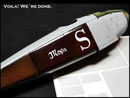
The above mentioned "sealing, done" is actually an important step. Not complicated, but important.
The first reason is the appearance of the decals. They only appear as they should once they are sealed with clear. The woodgrain printed on the decal will now stand out and be spot-on-visible.
We also have some technical reasons for a sealing coat.
We need to make sure that we have a solid and stabile clear coat. Especially the edge of a decal bears the risk to be lifted off. Please care for that area intensively and cover it carefully. Its not the amount of clear which is crucial, its the way we apply it. I recommend to work in three rather thin layers, allowing some 15 minutes drying time from layer to layer.
If we got that, we can go on.
The decals can be applied on the flat basecoat after some 15 minutes. For the masks we should wait until the entire system of layers really has cured. Two days is not too long to make sure that everything is fine.
With the good feeling that we have done everything right and are prepared the best way, we now can tackle the masks.
You may click on the upper left picture to enter the gallery and to navigate comfortably through the pictures.


One more option: Incorporating Oil Colors
Here is another option for medium dark wood. It recreates the natural process of sealing timbers using a brownish Schellack-Type clear.
We need some:
- Fine Veneer or Knotless woodgrain decal
- Colors for the basecoat (Radome/ Flesh)
- Preshading stuff (if desired)
- Oil colors (Burnt Sienna)
- Rapid Dry Medium (would be nice, we work on that at the time)
All we do now is the ol´drill by preparing a basecot and apply decals. There we go:


Now we recreate the Schellack by incorporating a glaze of Burnt Sienna Oil colors. It really makes sense to use a drying medium here, otherwise we would have to wait for like 5 days.


Decals too pristine. How to fix that?
After decal application I noticed that the white parts of the insignia pop out like a flash light. Its needs a filter to tone them down and it needs to be done on the spot only, and not at the entire fuselage.
Again I had the pleasure to have access to thre great product features of the Mr.Paint Colors:
- Superfine Spray Jet,
- Superfine Pigments
- Superthin carrier medium.
If we have resin in our carrier medium, like we have in most of the available acrylics and enamels, the resin will stand out in a prominent way. If we dont have resin there, like with the Mr.Paint Colors, it will be absolutely flush and smooth. Thats one major asset of the Mr.Paint Colors. Thats a major asset of Inks in general, btw.


UvdR-3 Rigging Thread
DPC-35 Disc camo masking stencil for late Panther Ausfuerung G.
MAH and MAN production Panthers, Sept-Oct 1944. A tutorial by Javier Soler Gonzales


UvDR-1 Burnishing Agent
A matter of time.Tutorial video showing the effect of Uschi´s burnishing agent in real time.
Tips and hints regarding the burnishing agent
Clean before immersion
why:
Avoid uncovered spots causing irregular colouring
Use a plastic tray
why:
Avoid unintended reactions with other tray materials
thin 1:1 with water
why:
Better control if you aim for natural results.
More time to eleminate bubbles (irregular colouring)
Better coverage when immersed completely ((irregular colouring))
Separate the emerging sediment before store for re-use
why:
Avoid prolonged and unintended chemical reactions causing the
"exhausting" of the product over the time once stored.
UvdR-2 Brass Burnishing Agent
WGC/WGF wood grain decal series Tutorial video
WGC/WGF wood grain decal series Tutorial step by step
Eduard´s 1/48 Alabtros D.III


Actually you do not need to work 100.000% correctly at this stage. It´s not a finishing work. The finish comes later in form of the glaze. You will then have the option to hide any little imperfections and integrate them into the picture. The glaze will cover anything nice and smooth. Well this is not a charter to work inaccurate, but you know...just in case.

At this point again you have options.
If you like a clear and pronounced wood grain, just seal the decals with mat clear and get ready for the glaze.
If you prefer a rather subtile effect, give it a misting coat of flesh or radome for example, to reduce the impact and make it more balanced and not that prominent.


For best results, I recommed the use of both types of decals mixed with each other. Coarse and fine texture is available in small and large.
Small is fine for the 72nd scale (WGC/WGF 72), large fits the scales from 1/48th to 1/24th (WGC/WGF 48)