
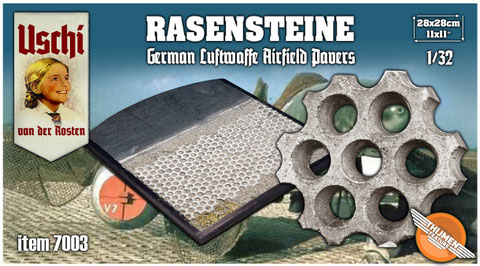
German WWII Airfield Grass Pavers "RASENSTEINE"

Rasensteine are avialable in 1/32, 1/48 and 1/72. Per July 8th 2025, the day of this entry, we have the 32nd scale released with the other scales following shortly.
WHAT IS RASENSTEINE? A SHORT DESCRIPTION
Rasensteine are 3d printed miniatures of WWII German Airfield concrete pavers, available in the most common scales in aircraft modeling. (32/48/72)
Any... as in ALL.... scale model of a WWII Luftwaffe aircraft can be combined with these. Rasensteine repesent pavings for taxi and parking positions. They have seen use all across Germany and in
many parts of Europe. Item 7003 is the standard edition in 1/32 and it is capable of covering an area of 28x28cm. Item 7004 is the smaller edition of pavers, covering approx 21x19cm, again in the
1/32nd. It is recommend combining the pavers with grass, sand or concrete slabs for maximum variety. All versions of the paver kits contain the pavers, a bag of gravel (for being mixed with
acrylic diorama paste) as well as a manual. In the 48th scale version there would be prints included (see image below) but I´m not 100% sure. I´ll update this page accordingly.
Application pretty simple and the results are very effective. Just plan your layout, glue the pavers to the base, hit them with primer, paint and secure some speckle effects and you´re half way there. After that, make sure your paint job is secured (flat clear varnish) and smear dark acrylic dio paste all over it and remove all excess. Presto. The rest is garnishing. Below you will find a more detailed description. Enjoy the ride

DETAILED INTRODUCTION
How to describe this... hmm. German Concrete Marsden Matting maybe. That would not be too far off in regards to it´s functionality. EXCEPT for the fact that I could not find any evidence for
these pavers being used for any high speed traffic such as on take off and/or landing which was a feature with Marsden Matting. Design wise, a totally different approach anyway. ok, so what are
we looking at?
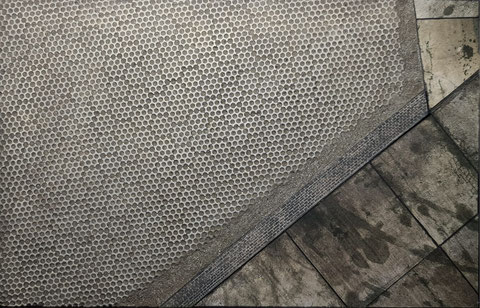
We are talking about a perforated concrete paver for being used in taxi and parking areas. We have evidence for it being used in Denmark and we have evidence (?) for it being used at what I believe to be Lagerlechfeld (Lechfeld) airbase. Lechfeld served partially as a test airfield for advanced Messerschmitt products, such as the Me-163 (Hanna Reitsch) and of course the Me-262. I will expand on this further down below in the chapter MESSERSCHMITT IN LECHFELD
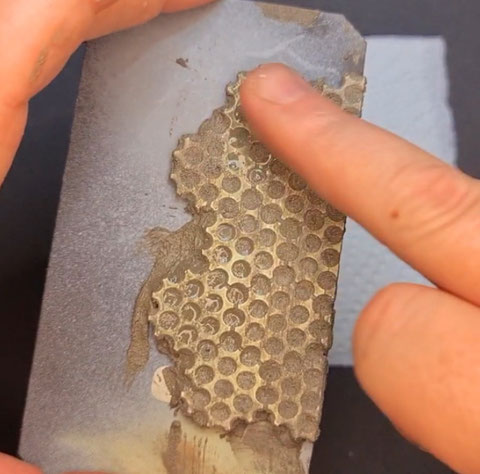
The pavers were 80x80cm in real life. Seven holes were cast in it to assure water could drain and to prevent it from shifting. To my knowledge they were not physically connected to each other.
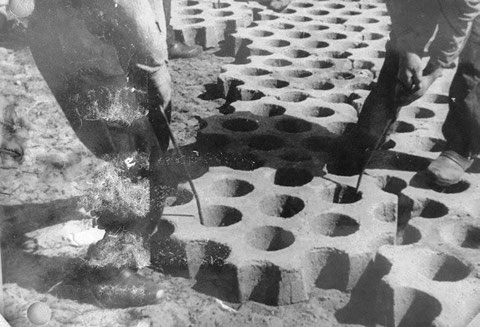
Apparently they were laid out on compacted ground, covered with earth and again compacted. Excess gravel was removed and after that, funktionality was assured.
In Danmark the Pavers had a specific name: Clausensten, named after a Danish contractor (Clausen) producing the pavers "on site" in Danmark. That´s one of the benefits of this simple system, btw:
You can cast these items pretty much everywhere in a relatively short time. I would definitley recommend to have a look on the website www.felthangar.beretning.dk. They went pretty deep into the topic.
MESSERSCHMITT IN LECHFELD
(Please be advised: I´m not a historian. I´m merely putting together a conclusion resulting from the fragmented information available) The field was used for high performance aircraft testing because the factory airfield in Augsburg -Haunstetten was merely a grass field and together with it´s factory buildings a frequent target for air raids. The days of Haunstetten might have been counted anyway because the city started to expand around Haunstetten already, whereas at the same time the jet age popped around the corner, requiring more lengthy runway for operations.
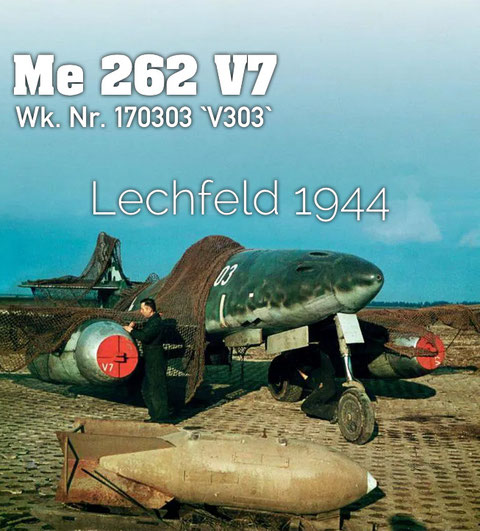

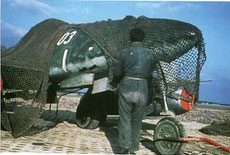

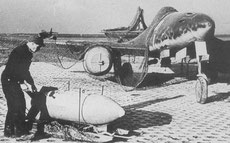

The images above are the the most iconic (colorized) images of a 262. The austrian painter plus some staffers wanted to turn a fighter into a light bomber so we see some SC-250s (?) arranged in front of a 262 equipped with "Wikingerschiff" bomb racks in what I believe to be Lechfeld airfied. The aircraft in question might be the Me 262 V-7 Werk-Nr. 170303 which would bring us to some Erprobungskommandos (Testing and Evaluation Commands) and thus to Lechfeld. I have no primary source for this claim. However, I have more than one independent source. That´s at least the journalist standard of research, so I´ll go with it.
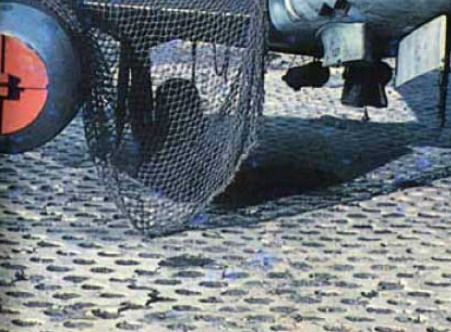

Upon closer inspection of the images provided in here, you might notice that the pavers are not perfectly aligned all the time. Which brings us to a very important feature:
PRODUCT FEATURES AND APPLICATION

DEFINITION: The THIJMEN FEATURE is a design feature of the 3d printed Uschi van der Rosten miniature Rasensteine WWII Luftwaffe Airfield Pavers.
The feature is acting as
- Connectors between the single Rasensteine
- Spacers to be filled with "gravel" when applied "en bloque"
- Pre-determined breaking/cutting points for installations as single Rasensteine
Especially No.3 comes in quite handy on the attempt to render irregularities as shown on the images above. Yes, you could consider executing the entire surface in singles, or ar least in sections and singles combined.
Since we would be using acrylic texture paste, the paste would need to get caught somewhere, filling the holes and visually separating the pavers from one another, whilst keeping them together for convinient application "en bloque". The Thijmen feature would make sure this being secured in case you go all, or mostly in sections ("en bloque").
This feature has been brought to reality by the Dutch modeler Thijmen Broer, hence the name Thijmen Feature. Thijmen specializes in the subject 'Dutch Military aviation' in the 1/48th scale. He has an education background and he is giving airbrush classes in a wide array of scale modeling subjects.

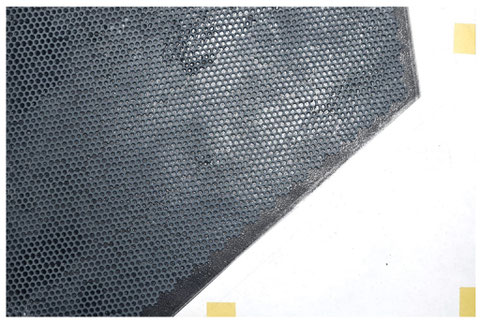
A "bloque" of Rasensteine, ready for being laid out and painted
RULES OF ENGAGEMENT
- Prime the units/blocks (or separated pavers) using a spray can. Use WHITE automotive primer from the DUY shop because you goinna burn through quite some primer with most of it going through the holes. That or you might start with the next step and prime directly on the base. Which would go like this:
- Arrange your layout. Fix units and/or separate pavers according to plan. Use superglue fixing your layout to an appropriate base. When combining with a different surface texture, be sure the upper surfaces of the pavers line up with the height of the adjacent type of ground texture. (Grass, concrete).
- Make sure you capture the visual characteristics: Pavers always brighter than earth/gravel.
- Apply bright gray acrylic paint. Consider filters.
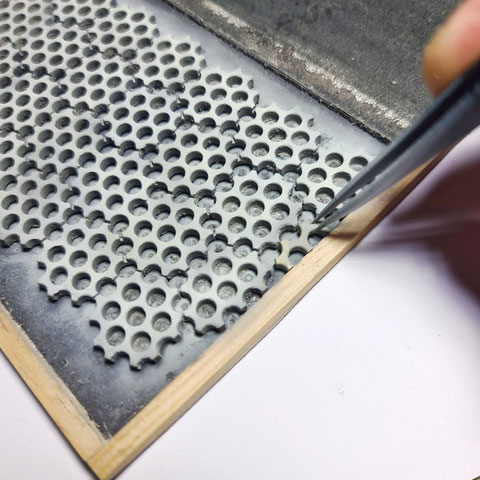
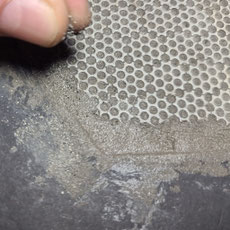
- Use the speckling technique (toothbrush, illustrated below) in order to apply more visual texture. Use diluted oil paint. Colors being recommended for speckling: Black, White, Brown, Beige. Seal with Flat Clear Varnish.
- !ALWAYS MAKE SURE THE PAVERS BEING PAINTED BRIGHTER THAN THE EARTH THEY ARE BEING COMBINED WITH!
- I did not find a single reference showing the opposite. So in order to capture the iconic look, please kindly proceed as advised.
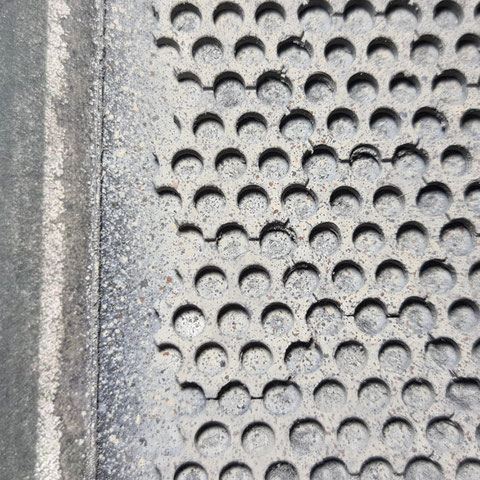
Separated pavers might be trimmed in order to match your layout. Pavers fixed with CA and primed and painted in Light Grey.

Diluted oil paint in Black, White, Brown and Beige/Ochre being speckled over the layout
The speckling technique in effect, delivering a "grainy" visual texture. To the left: Printed texture on cardboard (Uschi Scenic Display Range)

Products recommended as a dio paste but not included in the kit. The kit does contain a bag with sand as well, so textures can be adjusted as required.

After painting: Paste on
Remove with spatula, hands or kitchen towel and some water. Prepare for a second turn if required.
AT THIS POINT I may have to insert a little plug. When you are working on larger displays, I would recommend to work in sections as well as in two turns.
The first turn would involve quite some water. The water would naturally remove quite some air already. Just let it dry and prep for a second turn of diorama paste. In case you are using MDF or
wood or anything else that would absorb water, please consider a waterproof protective layer. Otherwise the base plate could swell which would cause issues we dont want nor need.

COMBINATIONS WITH OTHER TEXTURES
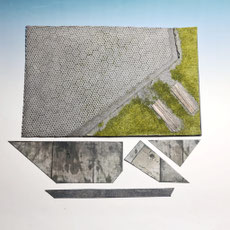
I think the biggest potential of the set is in it´s ways of combinations, with concrete and turf being the most obvious. Let´s focus on these two, this time operating within the 48th scale. With concrete you want to have the concrete sitting a tad higher, with turf you probably want to be on the same level. Let´s enter a planning stage scenario including concrete real quick.
THE 48th SCALE VERSION WOULD CONTAIN RASENSTEINE AS WELL AS PRINTED CONCRETE, ENOUGH TO COVER AN A-4 FORMAT BASE WITH RASENSTEINE AND CONCRETE.
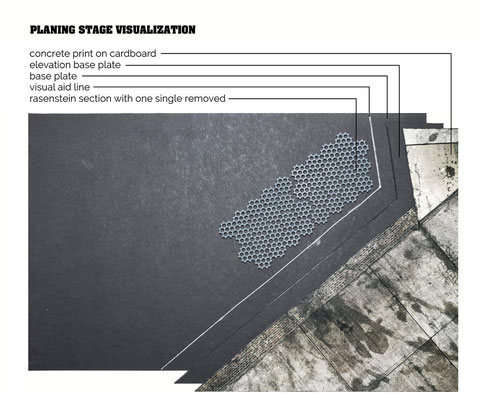
Once we have decided how we would like to arrange, we can actually fix the Rasenstein- units accordingly.
On the image above, I masked off the elevation layer real quick and hit the entire thing with spray glue. Some areas were glued using CA. First I covered everything with units and made sure that I have enough singles to cover the missing spaces with excess singles from the cutaway process.

Happy with the layout. Everyting has been hit with white primer. That´s serving two puposes, with one being well...priming it and the other one being making my Black 2mm cardboard waterproof so
it would not swell once the diorama terrain paste comes in. Remember, it can get quite wet on the first application.
As being mentioned above, this was followed by hitting it with concrete Grey and some of the sprinkling technique with oil paints.

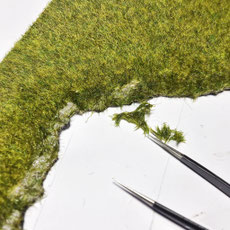
In the meantime one could also switch to the prints real quick. The elements of the prints should ALL BE SEPARATED LIKE A PUZZLE. One should paint all white edges with a Black pencil. This way we
can work in grass and / or sand if required.
On the image above I used an old blunt blade and pressed some texture into the cardboard. One doesnt have to follow exactly the printed texture.
After that the cardboard got hit with GLOSS CLEAR in order so seal it as a prep for what comes next.

Oil wash with Beige

Cross checking how the textures look like once being combined. One can brighten up the concrete with a transparent mist of concrete Grey if required. Would eat some of the contrast but on this particular print the contrast is quite heavy anyway.

First turn of paste comes in. I used some water in order to make it set in the holes better. Next day the second turn of paste came in, levelling everything.

Second turn of paste is on. Dont worry about the few holes left here and there. These are coming in handy. Let´s dry brush the stones for more contrast first.

Left: Closing the gap to the elevation plate with paste and instantly sprinkling sand over it. Can be done later as well. The paste can be trated with some water so it would be sticky again Right: Gently pressing in the sand.
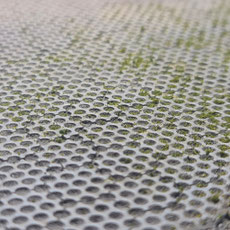
A look on the situation. Fine tuning is what would be required in order to organically blend everything into each other. THERE IS ONE LAST THING in order to finish the job: SPRINKLE RAIL ROAD GREEN over it and fix it with a "rain" of flat gloss. By "rain" I mean that we sprinkle the Green flockage and hit it with flat clear from a large distance by airbrush. That´s a process that can be repeated with several types of flockage until we have a complex overall general appearance.


Alrighty. So that´s about that, I guess. As I said, it´s pretty simple and very effective. Just plan your layout, glue the pavers to the base, hit them with primer, paint and secure some speckle
effects and you´re good to move on. After that, smear the dio paste all over it and remove all excess. Presto. The rest is garnish.
ENJOY! :)